A few people have requested a tutorial on how to paint using Photoshop, so here it is!
A digital painting is a lot like a normal one, you need a decent eye for colour and shape. Because there are no definite steps to follow, this will be less of a tutorial and more of a walkthrough of how I personally paint.
Step 1. Choose your image.
You can paint anything, a person, object, animal, plant etc. and you can use a picture/s as a reference or create something from your own imagination.
If you use a picture, make sure it’s a large one; otherwise you won’t be able to pick up on all the colours. Zooming will only make it a pixelated blur. The same goes for your “canvasâ€, make it larger rather than smaller, it’ll make it a lot easier to paint and stretching it to make it larger after you’ve finished will only reduce the quality.
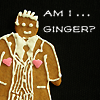
This is the picture I’m using for the walkthrough (click icons for larger versions):
The lack of background makes it slightly easier to paint, but then Hugh’s facial hair and wrinkles make it much harder. Painting people is also more difficult; it’s easier to notice if you don’t paint the human face quite right.
I chose Hugh Laurie because he's dead sexy and I could stare at him for hours :P (or days, as it turned out...)
Step 2. Open your image.
Create a new layer by selecting “Layer†from the top menu, then “New†and “Layerâ€. When a window pops up, enter the values:
Colour: None
Mode: Normal
Opacity: 100%You should now have a clear layer on top of the background image you’re painting. You can have the original picture separate from your painting but having it in the same file makes it a lot easier. You’ll need it nearby as a reference anyway.
Step 3. Select the Paint Brush icon from the toolbar.

Change the brush setting so you have a fairly small soft-edge brush with a medium Opacity, and change the Forground colour to black. I’m using 40%.
Click on your new transparent layer in the Layers window (bottom right of screen) so that it’s selected, and use your brush to paint the outline of the background image. You can do it by eye instead, but it’s difficult and time consuming.
To see how much you’ve done, just deselect the Visibility icon (the little eye) next to the Background layer. Then only your transparent layer will be visible.
Now Hugh looks like the bizarre love child of Elvis and a cast member of Fraggle Rock :P
Step 4. Colouring in!
Make both layers visible. Use the eyedropper tool to select the most dominant skin colour. You can do this by eye, but it’ll be a lot easier this way, and you only have to do it the once.
Make the Background layer invisible again. Change the paint brush so that it’s larger, but still soft edged and around 40% opaque.
Paint the main areas of the face, you can leave the darkest and lightest parts bare, we’ll get to them in a minute.
Once you’ve done that open the Colour Picker window again. Since you already have the main skin colour selected, it’ll be a lot easier to select the shadow and highlight tones. Just click a patch of colour a bit closer to the black side of the scale. That’ll become the shadow.
Use your Paint Brush (at a slightly smaller size) to paint the dark areas.
Use the Colour Picker window to choose an even darker shade and paint it on with an even smaller brush.
We’re going to blend the colours, so reduce the Opacity of your Paint Brush to about 20%/15%. Instead of using the Colour Picker, use the Eye Drop tool

to select an area where two of your different colours begin to meet. Since we’ve been using soft edge brushes, the colour will be faded out and will make it easier to blend.
Drag the brush along the meeting line of the new colours and a new tone should form. Just keep taking Eye Drop samples and painting until you think they’ve blended enough.
Step 5. Building up the rest of your picture.
I never just focus on one part of a picture at a time; I like to get one bit going, move onto another, then another, and then go back to where I originally started. Building it up this way, you can see how it’s all coming together. If you focus on just one part, get it completed then finally start on the next part, you may notice that the picture doesn’t work as a whole and then have to start all over again.
Choose a colour for the hair. You can do this by taking a sample of the Background image, but I prefer to do my colouring by eye. It doesn’t matter if it’s exactly right, just choose the main colour or something close to it. You’ll be painting over it repeatedly, so it doesn’t really matter.
Do the same for the other blank areas of the picture (in this case, the suit, shirt and neck).
At this point, the blanks eyes and mouth started to freak me out a little, so I moved onto them :P
Don’t use pure white for eyeballs, it never looks right. Go for something with a bit of a pink/grey tone.
I also out a put a bit more colour into the hair, just using a slight change of tone like I did for the skin.
Since every part of the picture is filled out to some extent, start to put more detail in. I decided the skin colour wasn’t how I wanted, so I chose a red/brown tone, used a large soft edge brush with very low opacity and painted over most of the face. I left the highlight parts how they were (cheeks, forehead and nose). Parts of the outline also needed reshaping (the hairline wasn’t right as well as the general nose shape).
Step 6. Facial features.
To put detail in the facial features, use a smaller soft edge brush, with an opacity of about 20%. You can adjust these settings if you think it’s necessary.
Keep using your Colour Picker window to select tones similar to the area you’re working on. One skin colour can be completely different to another, you want it to match.
The best advice I can give is to just keep looking at your Background image to make sure you’re painting the right colours in the right places.
Step 7. Hair.
Make a new layer between the Background and the transparent layer. Use the same settings as before but use the Fill tool

to paint the layer white. It’ll make it easier to see the outline of the hair we’re about to work on.
This is where we start to use the Smudge tool.
Set the Smudge tool to a medium, soft-edge brush at about 35% opacity. Have a play around with it, using it to spike the hair outline so it’s not so flat. You can pull parts of the hair outwards as well as dragging the background into the hair; it’ll make it look more realistic.
You can also make the hair itself look more textured. Since some darker colour was painted onto the hair before, just Smudge dark sections into light sections and vice-versa. Also Smudge some down onto the forhead, so the hairline isn’t so flat.
Smaller brush sizes are perfect for making individual hairs.
Step 8. Burn and Dodge.
The Burn and Dodge tools are an easy way to create shadows (Burn) and highlights (Dodge).
You can choose which parts of the image the tools were affect the most by selecting “Shadowsâ€, “Midtones†or “Highlightsâ€.
Try Burning and Dodging the hair first.
Use a larger low opacity brush to slightly Burn darker areas of the hair. Then use a small, high opacity brush to detail individual hairs. Do the same for Dodging.
Dodge and Burn other areas of the face, suit and shirt. Burn areas the light doesn’t reach and Dodge places that the light touches.
These are all the tools you need to create a painting, so just keep going over your image, building it up until you’re happy with it.
I know I never think a picture is finished, so here’s what I’ve got so far:
There's still a lot left to go, but I knew that if I waited until I was happy with it to make this tutorial, it would never get posted ~:|
But all the steps and instructions you need are listed, so just keep painting!
I hope this walkthrough has been useful!
--------------------------------------------------------------------
*sigh* This took forever to make! ~:|
And it’s certainly a lot bigger than I wanted it to be, even though I edited about half of it out :P
Is this a good instruction guys? I feel like my steps aren’t very clear. Tell me if I’ve rambled on too much and I’ll try re-writing it.